A good picnic can last the whole day and a DIY squares game board can help you make it perfect. Good food in the sunshine, a game of squares and a little siesta on the picnic blanket when it all gets too much. That’s the fantasy at least!
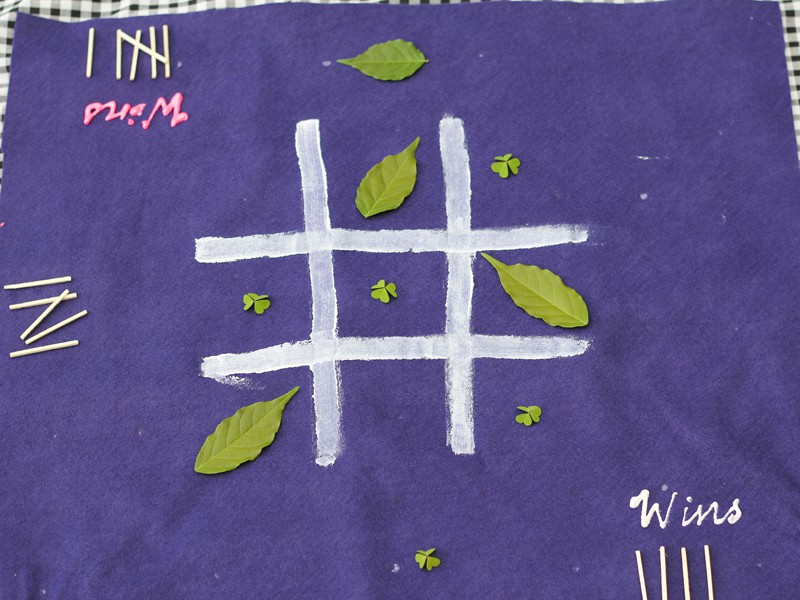
Quiet pursuits for the kids to get stuck into while you doze brings you one step closer to making that delicious nap a reality. You can easily pack a deck to play some card games. Making a DIY squares game board to roll up and keep in your picnic basket is actually very simple, too. On one side of the board is the old-fashioned (and oddly addictive) game of squares, on the other you can add a straightforward tic-tac-toe grid with an area to keep count of who is winning.
This is an excellent picnic game too: How to play the game of Fly
Make your board, then follow the instructions to learn how to play squares. It’s a fun way to occupy an afternoon.
DIY squares game board + how to play the game of squares
The instructions after the squares game board tutorial will teach you how to play the game of squares. We’ll assume you’re good for tic-tac-toe!
What you need
To make the game boards
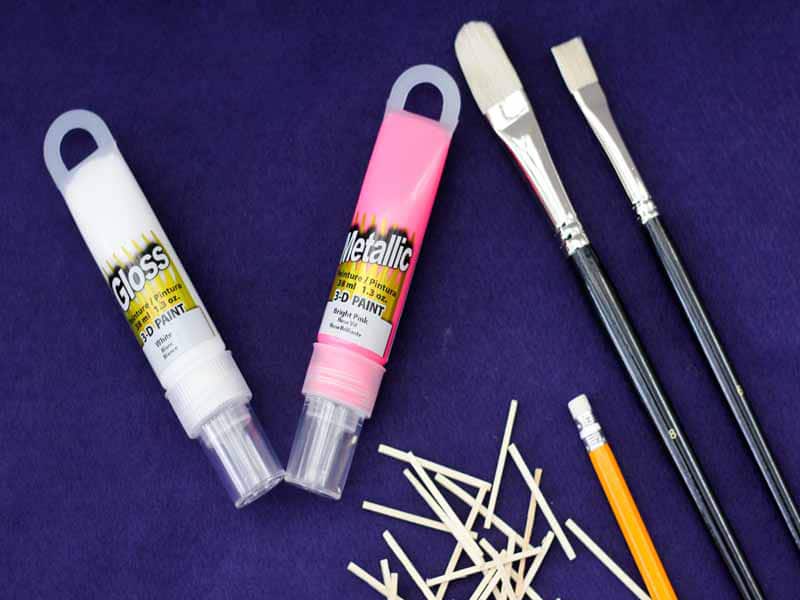
- square of coloured felt (mine is 50 x 50 cm)
- fabric paint (I used two colours, but one will do)
- pencil with an eraser
- paint brush
- couple of craft matchsticks
To play the games

- craft matchsticks
- 2 different sorts of tokens – plastic or natural
How to make the DIY squares game board
1. Lay the felt out flat on the table.
2. Squeeze the paint onto a spare piece of cardboard (or old plate, or pallet – whatever you usually use for paint).
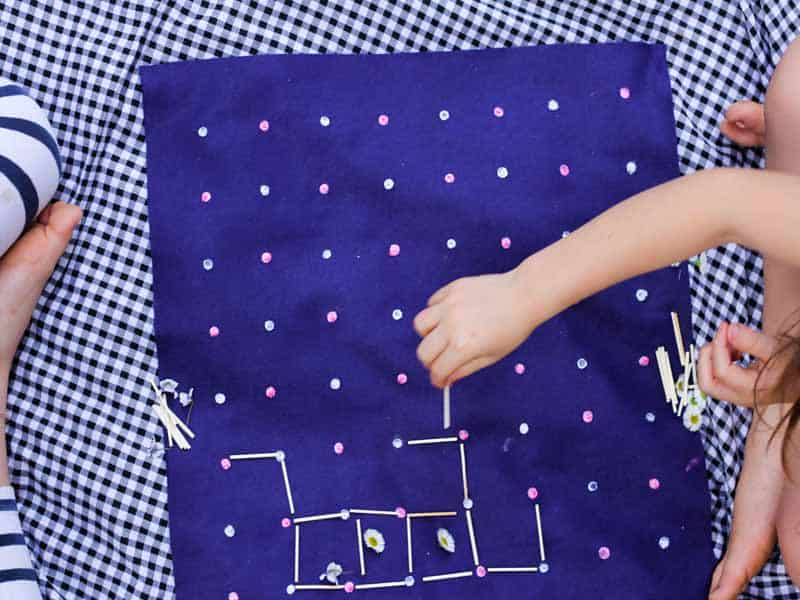
3. Measure one matchstick in from the top and left-hand side of your mat. Dip your eraser into your paint and make a dot at the top of the matchstick. Use another matchstick to line up beside the dot and mark a dot at the top of that matchstick. Keep going until you reach approximately one matchstick measure away from the other edge.
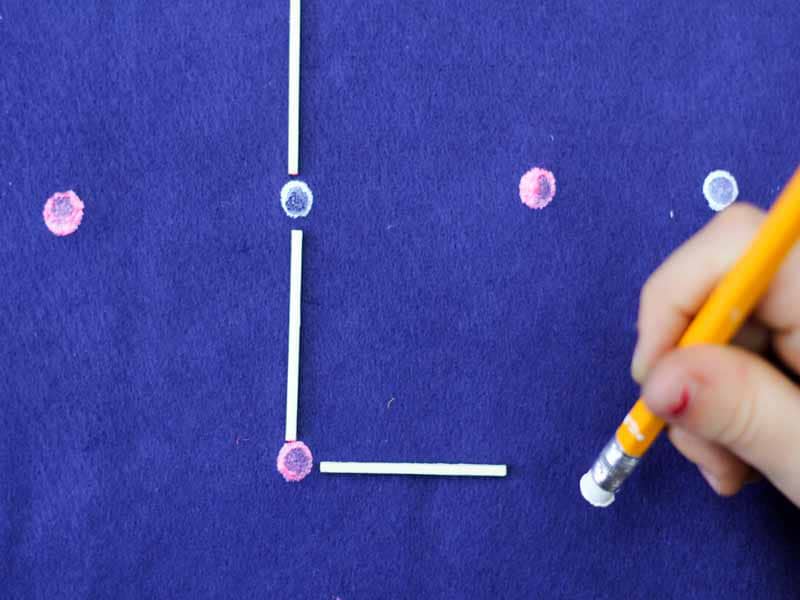
4. Once you’ve done your top row, you can use a matchstick to measure down one row and make a dot there. Now continue to create the second row of dots by measuring one matchstick down from every dot along the top row.

5. Continue until you’ve completed your whole mat.
6. Once dry, flip your mat over and paint a tic-tac-toe grid on the other side, plus an area for each play to keep track of wins. Add a matchstick each time you win a game.
How to play the game of squares
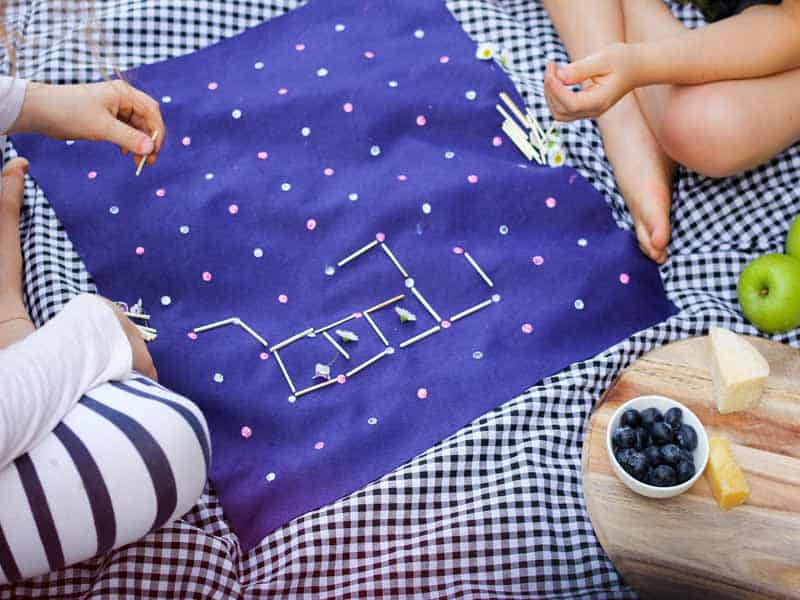
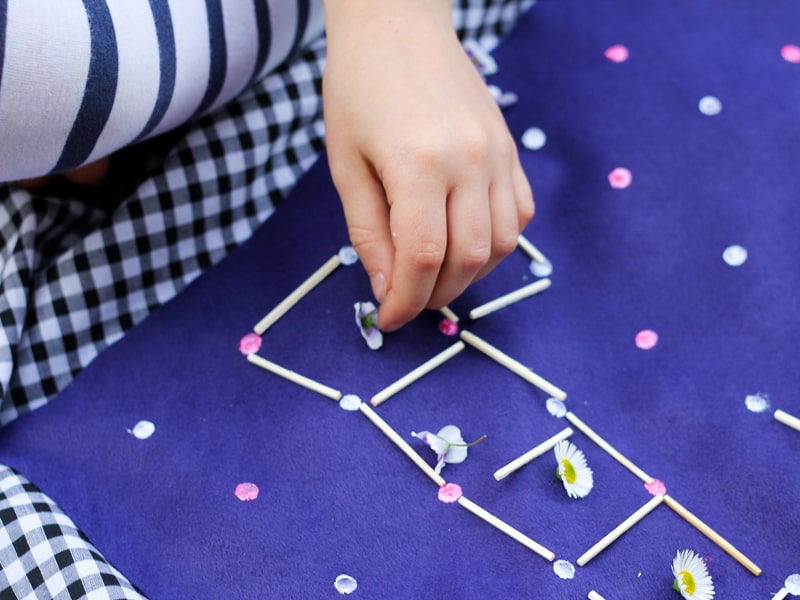
1. Allocate a token to each player (you can play with as many people as you like, as long as you each have an identifying token). Here we’ve used natural tokens – two different types of small flowers. Other natural objects that work well are small fruit (like blueberries and raspberries), nuts or seeds, two types of leaves or sticks.
2. Players take turns adding a matchstick between two unjoined adjacent dots.
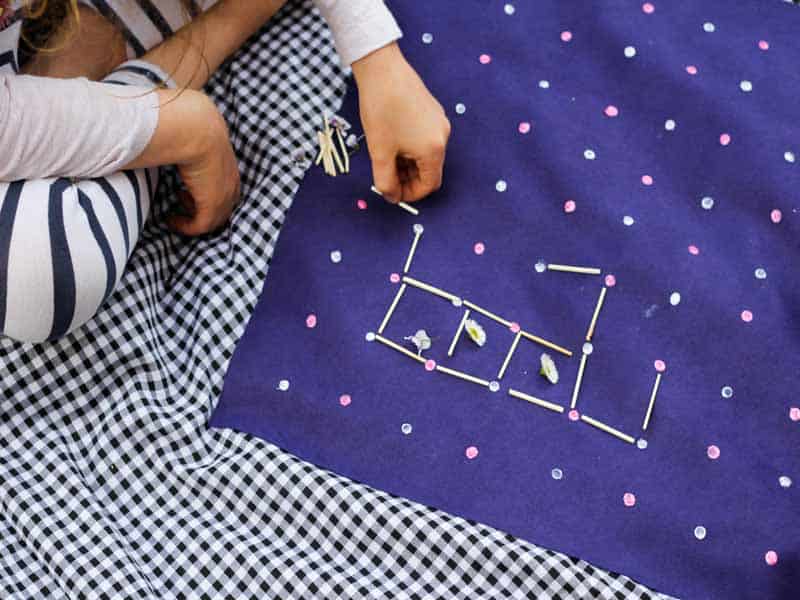
3. A player who completes the fourth side of a square earns one point and marks the box by placing their token inside the new square. The player then gets another turn.
4. The game ends when no more matchsticks can be placed and the winner of the game is the player with the most tokens on the board.
Did you play squares when you were a kid?